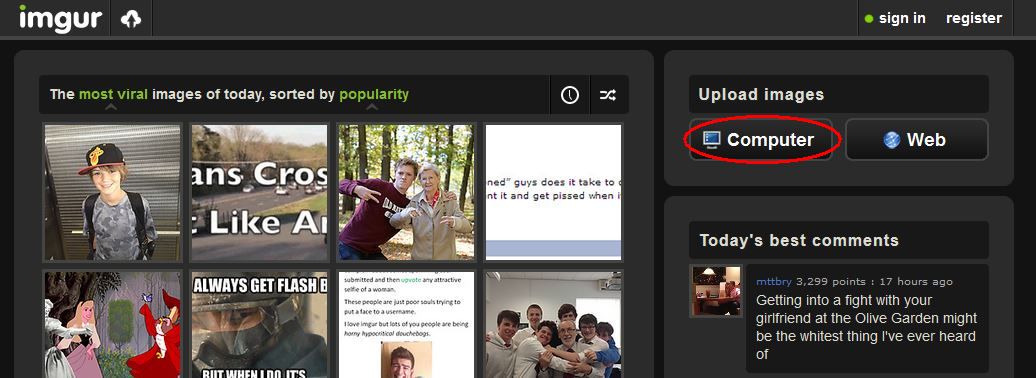
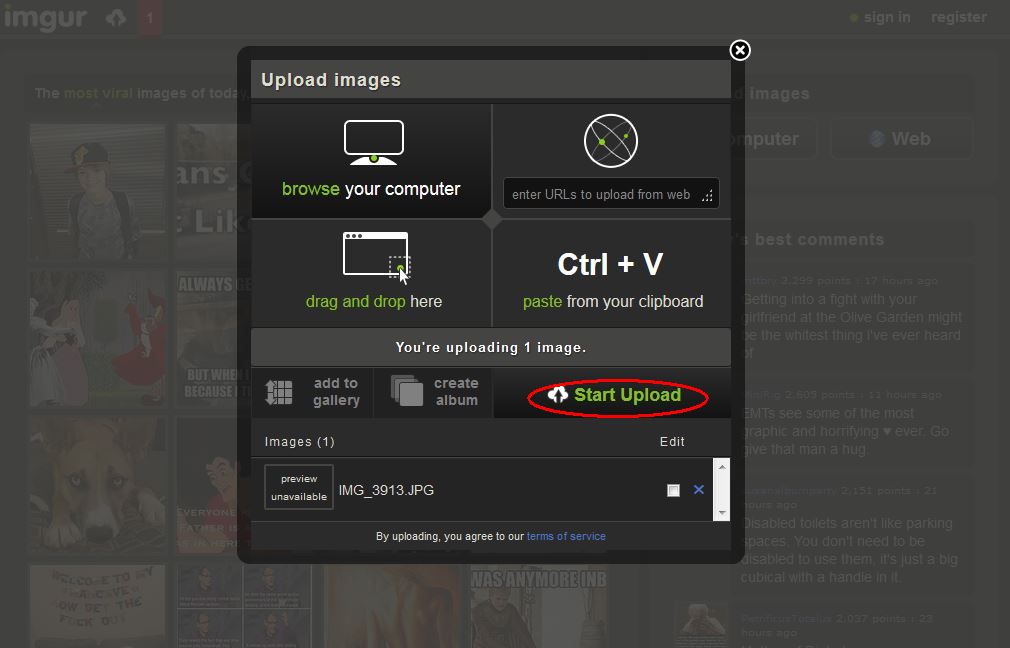
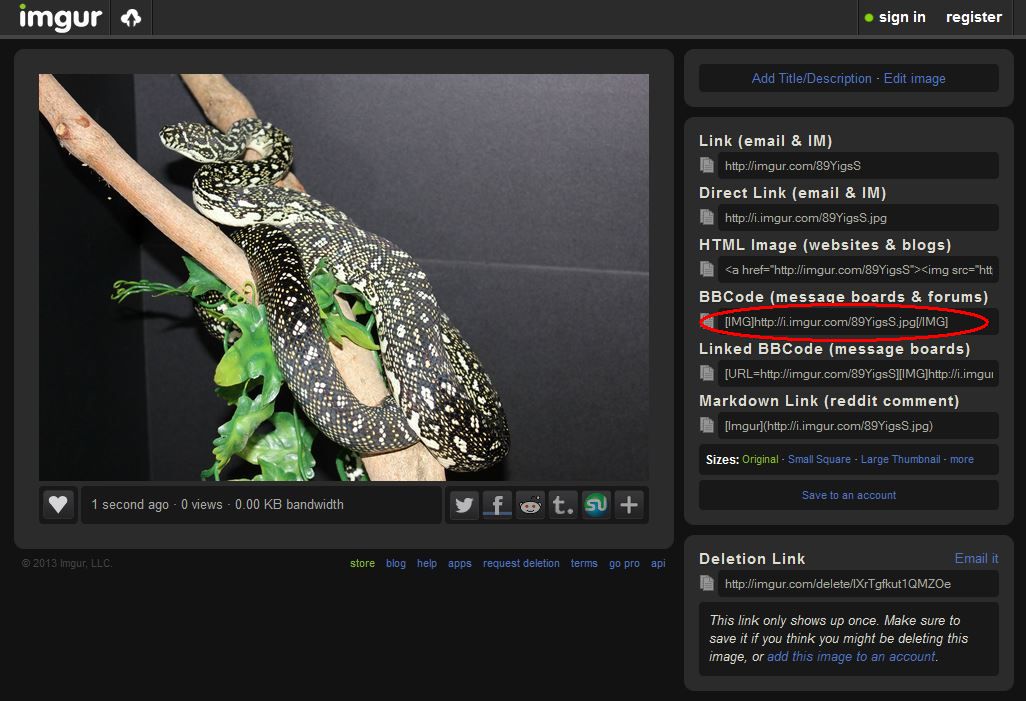
Given that there has been a lot of recent posts complaining about not being able to attach pics properly to posts, I thought I'd sit down and write a little guide. This guide will be split into two parts. The first part (this post) will cover uploading your images to APS. The second part will cover uploading your images to a remote picture hosting site and sharing the links here.
N.B. Currently there are several known issues that affect users of Internet Explorer 10 when posting to forums that use the vBulletin Software, such as APS. Therefore, for the purpose of this guide, I will be using Firefox instead.
If you attempt to upload a picture and the hourglass (blue circle) just sits there doing nothing, the only current fix is to use a different browser (Firefox, Chrome, etc.).
UPDATE December 2013: Internet Explorer 11 appears to have addressed the issues experienced in IE10 and therefore posting pictures as per this guide will now work as it should.
Important: There appears to have been a recent change taken place in the APS back-end that has placed a size limit on uploaded pictures to a resolution of 1024x768. Any pictures with a higher resolution will not currently successfully upload. So please ensure your pictures meet this size limit before continuing with this guide. This issue also affects the way attachments are displayed. There is no longer a thumbnail displayed, but just the attachment filename. N.B. THIS ISSUE HAS NOW BEEN FIXED
iPhone Users: Using the Safari browser, this guide works basically the same. The only difference being that the File Upload Manager opens in a new tab. Therefore, just upload your pic as per the instructions in this guide, then once it is done navigate back to the original tab to submit your post.
So, let's begin......
Firstly, you want to choose the Advanced editor. To do this, click the "Go Advanced" button down in the bottom right corner.

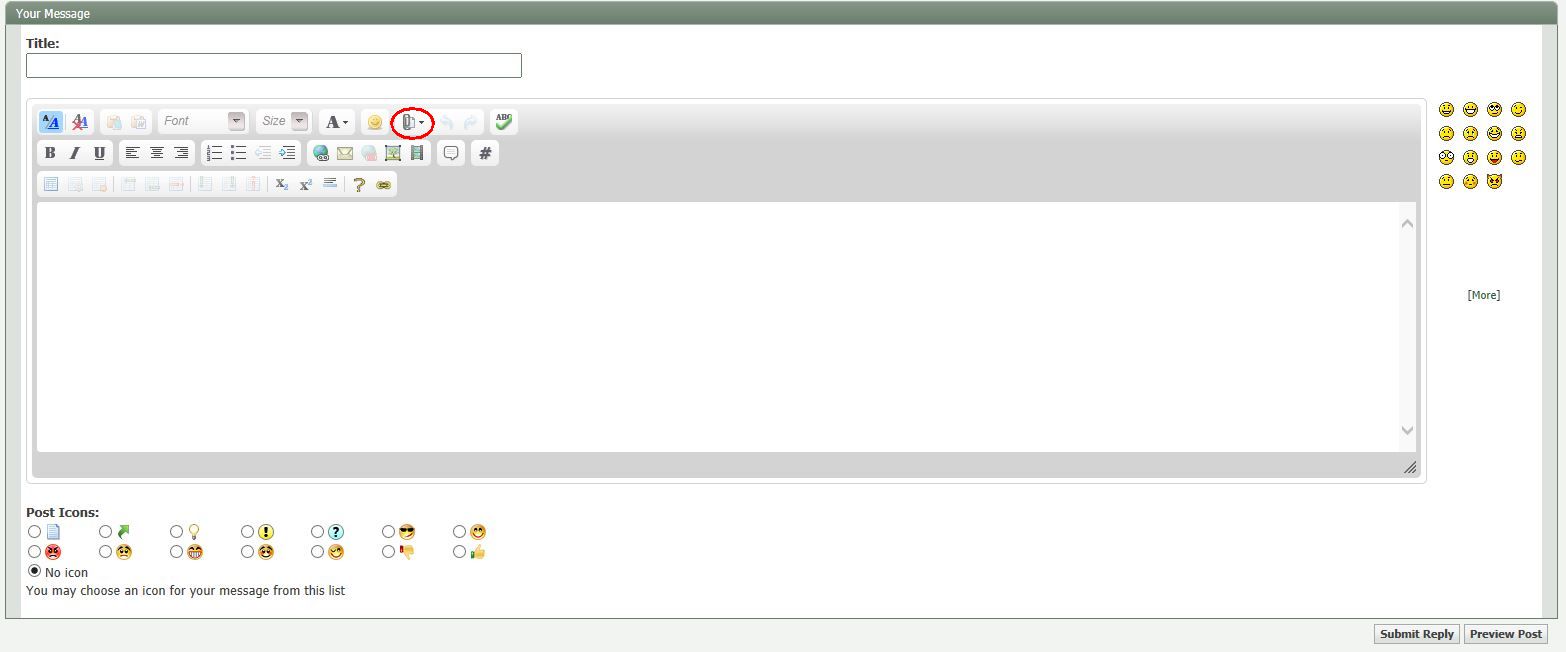
Next, we need to click the Attachments icon, that looks like a paperclip.
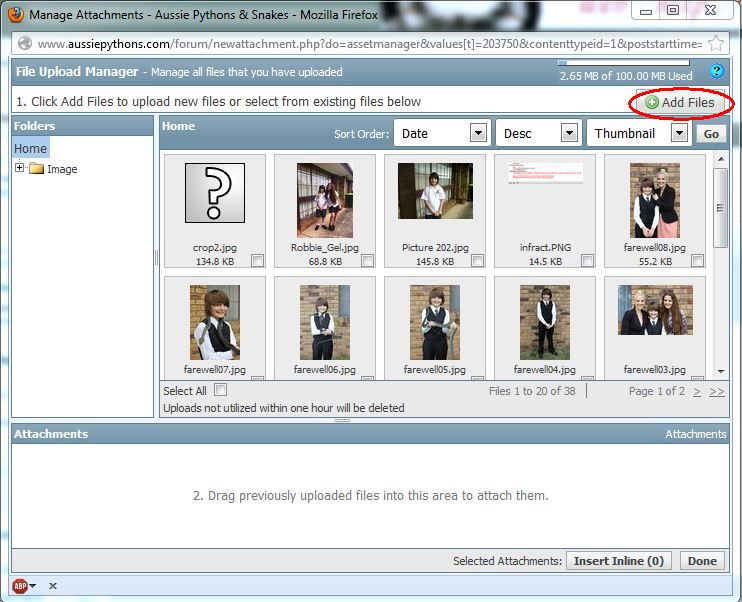
This will bring up the File Upload Manager. We now want to click on "Add Files".
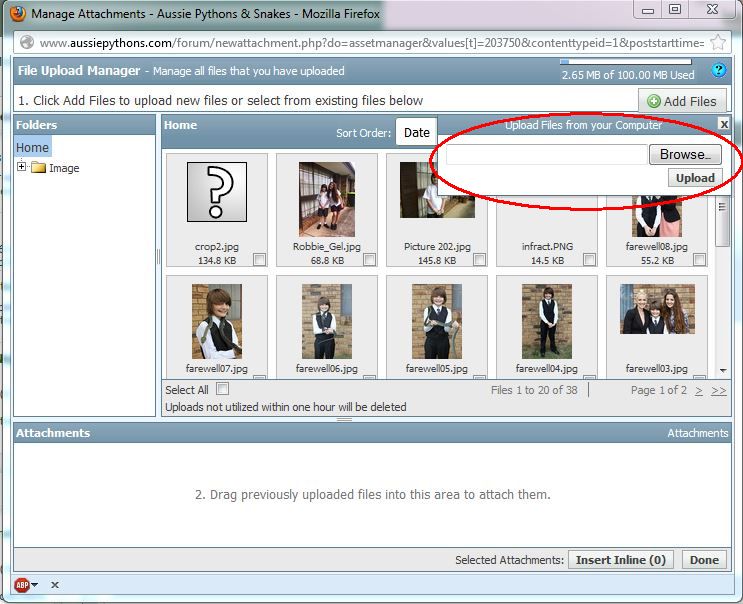
Now click on "Browse" to choose your picture, then click "Upload".
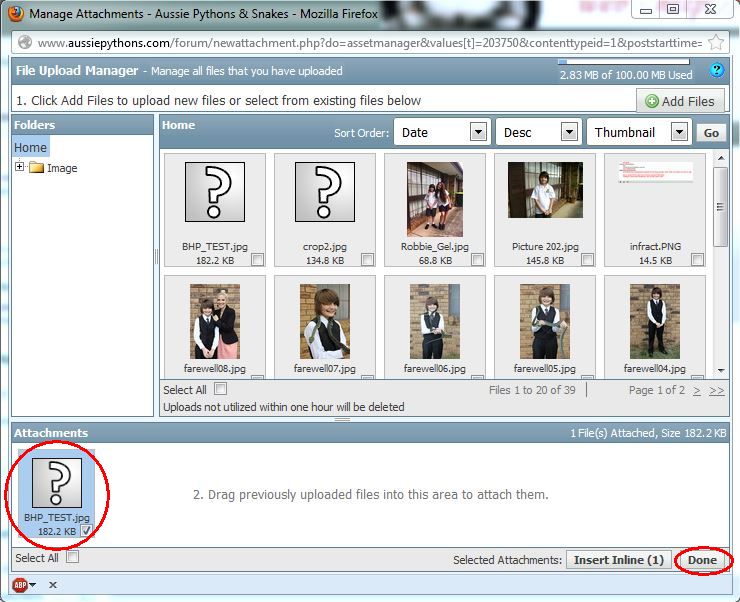
Once the upload has completed, you will be able to see it in the Attachments area. The icon will look like a "?", but this is fine. Click "Done" to close this window.
Now you can type your message. You will also notice that your picture is listed under the Attachments section. Once you have finished typing your message, click on "Preview Post".
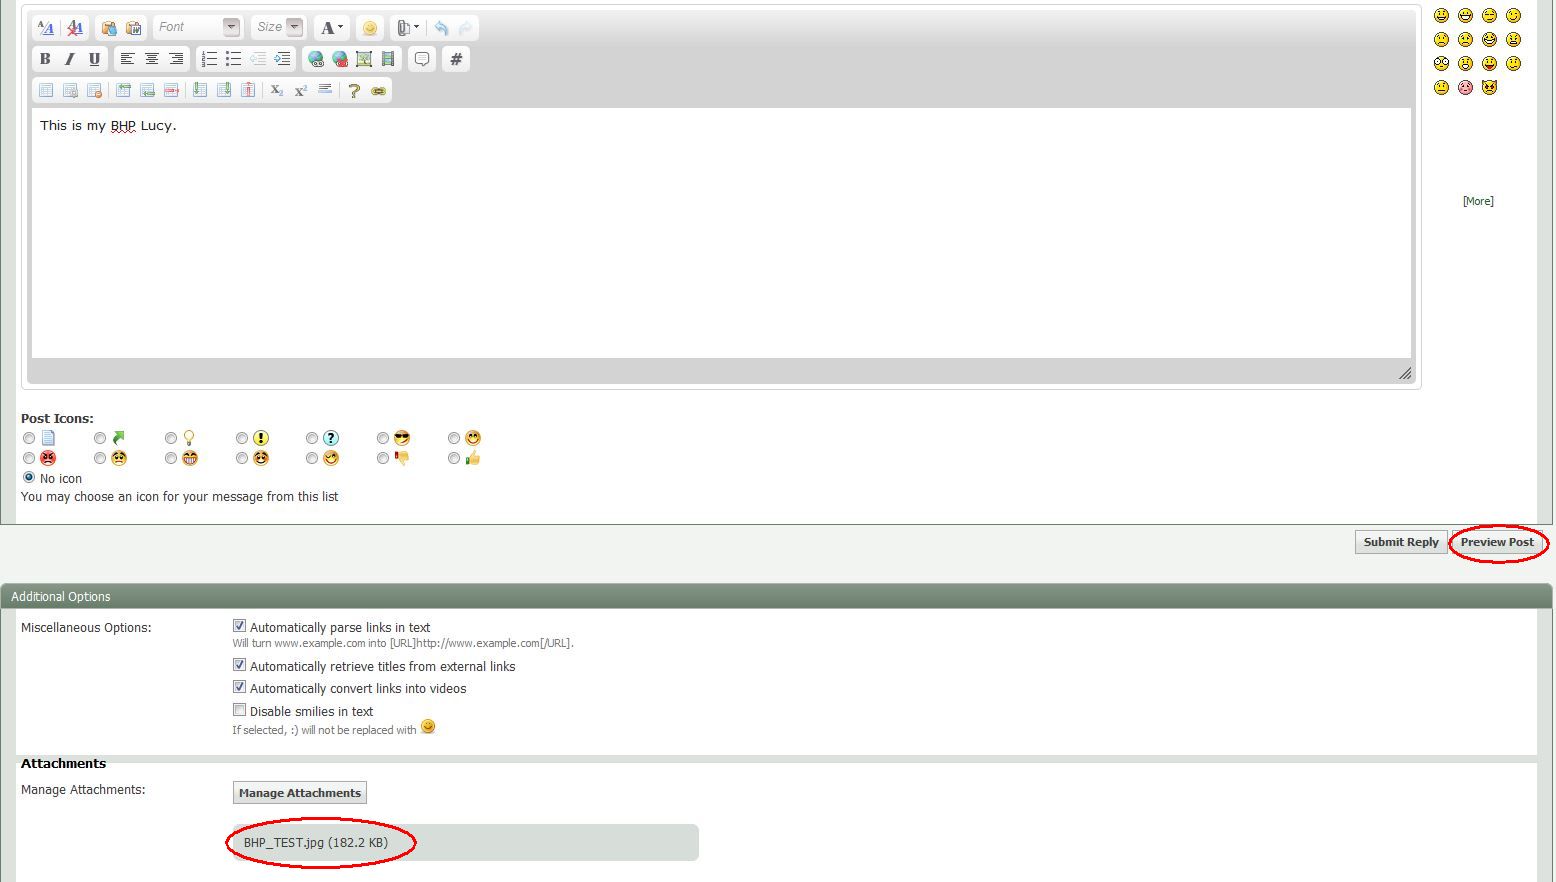
Now you can see the preview of your post. If you are not happy with it, make the relevant changes. Once you are happy with the result, click "Submit Reply".
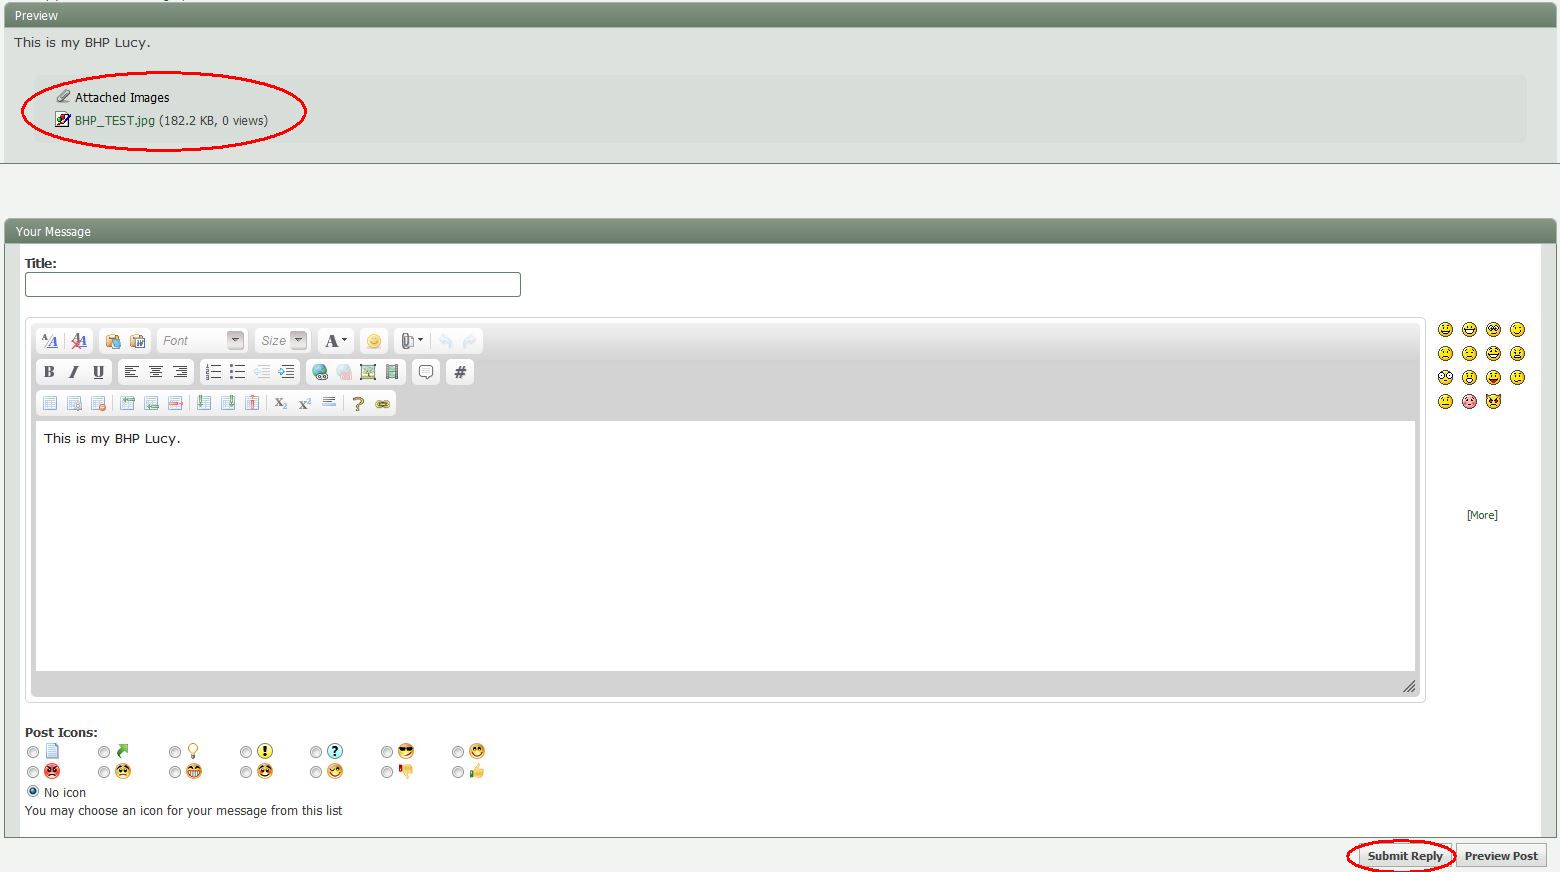
Now here is the completed post. All done.

N.B. Currently there are several known issues that affect users of Internet Explorer 10 when posting to forums that use the vBulletin Software, such as APS. Therefore, for the purpose of this guide, I will be using Firefox instead.
UPDATE December 2013: Internet Explorer 11 appears to have addressed the issues experienced in IE10 and therefore posting pictures as per this guide will now work as it should.
iPhone Users: Using the Safari browser, this guide works basically the same. The only difference being that the File Upload Manager opens in a new tab. Therefore, just upload your pic as per the instructions in this guide, then once it is done navigate back to the original tab to submit your post.
So, let's begin......
Firstly, you want to choose the Advanced editor. To do this, click the "Go Advanced" button down in the bottom right corner.

Next, we need to click the Attachments icon, that looks like a paperclip.

This will bring up the File Upload Manager. We now want to click on "Add Files".

Now click on "Browse" to choose your picture, then click "Upload".

Once the upload has completed, you will be able to see it in the Attachments area. The icon will look like a "?", but this is fine. Click "Done" to close this window.

Now you can type your message. You will also notice that your picture is listed under the Attachments section. Once you have finished typing your message, click on "Preview Post".

Now you can see the preview of your post. If you are not happy with it, make the relevant changes. Once you are happy with the result, click "Submit Reply".

Now here is the completed post. All done.

Last edited:


